

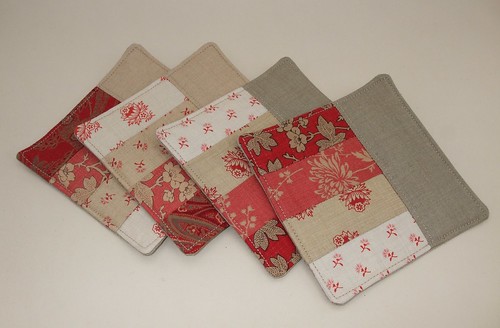
 I'm busily preparing for my first ever craft fair at the moment & haven't got much time for blogging - but this place is seriously in need of an update! I'm trying hard to make use of the fabrics in my stash to create lots of loveliness to wow the public with (ha ha), and these coasters are one of the things I've come up with. I bought a charm pack of the Rouenneries collection from French General quite a while ago now - I was totally seduced by all those beautiful reds and faded creams and browns - it's a gorgeous collection. I wondered about making a bag or two, using the squares in decorative strips (an idea I'm definitely going to use at some point), but time being rather limited, I decided to do something a little more straightforward. I'm busily preparing for my first ever craft fair at the moment & haven't got much time for blogging - but this place is seriously in need of an update! I'm trying hard to make use of the fabrics in my stash to create lots of loveliness to wow the public with (ha ha), and these coasters are one of the things I've come up with. I bought a charm pack of the Rouenneries collection from French General quite a while ago now - I was totally seduced by all those beautiful reds and faded creams and browns - it's a gorgeous collection. I wondered about making a bag or two, using the squares in decorative strips (an idea I'm definitely going to use at some point), but time being rather limited, I decided to do something a little more straightforward. These coasters were huge fun to make, so much so that I'm just completing some more using Amy Butler fabrics. What worries me about them is whether people buy coasters any more, and what on earth to charge for them! They take a fair bit of time to make, and I have a feeling that if I charge a realistic price for them no one will be interested. But that's so often the trouble with handmade. Ho hum - I guess all I can do is give it a go. |
Showing posts with label coasters. Show all posts
Showing posts with label coasters. Show all posts
Tuesday, 6 April 2010
Working Through My Stash

Saturday, 4 April 2009
A Little Experiment with Patchwork and Quilting...
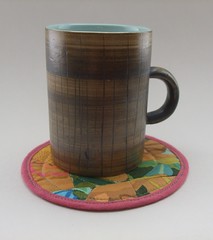
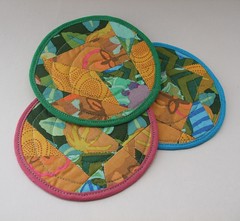
I am pleased with result, and it was so enjoyable to do... I think I might make a few more - if I do square ones then they might not be quite so fiddly either!
The coffee mug in the photo up at the top is from my gorgeous Cinqe Ports Rye coffee set and dates from the late 50s. That's another charity shop find - just ocassionally I get lucky and find something very lovely. Makes all that trundling round worthwhile.
Subscribe to:
Posts (Atom)