


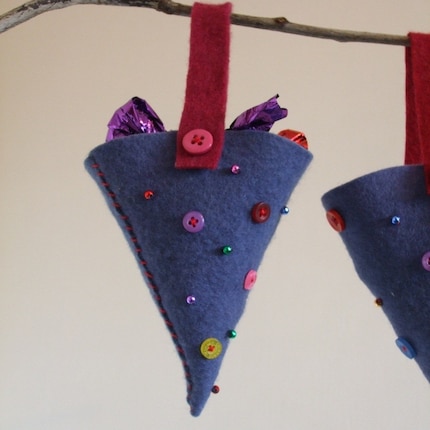
 These felt Christmas tree decorations were pretty much the bestsellers when we started selling craft kits on Ebay last year (we've moved over to Etsy now - a much nicer place to be). You can buy a kit containing all you need to make one again this year but I thought it would be fun to offer the pattern as a resource for people who want to go & get their own bits & pieces for the project (or of course, you can raid your stash!).
Depending on how you fast you sew, this really isn't a time-consuming project & the results are really pretty. I reckon a beginner could make one of these in an afternoon so there's nothing stopping you! We use them to hold a big handful of sweets or chocolate money & then hang them on the tree.
You will need:
1 piece of felt about 12x25cm for main body of hat
1 piece of felt about 1.5cmx20cm for the hanging loopembroidery thread
assorted buttons and beads to decorate
2 larger buttons to attach the hanging loop
needle & a couple of pins
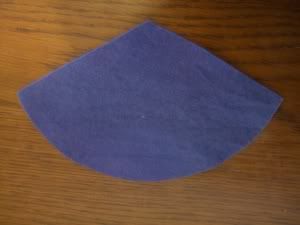
Step 1
Cut the larger piece of felt so that it will form the shape of a cone when rolled. In the picture the 2 short sides are 12cm in length & the inner angle is about 130 degrees.
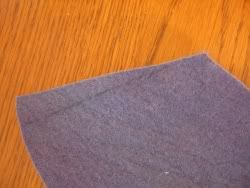
Step 2
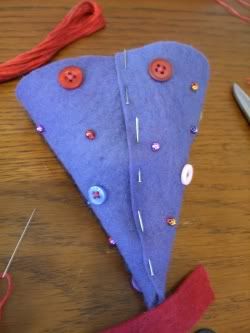
You don't have to do this next step, but I find it very helpful to mark a line 1cm along the curved edge to the central point (see picture). This reminds me not to sew any beads or buttons on that area which will be covered when you roll the hat into the cone shape.
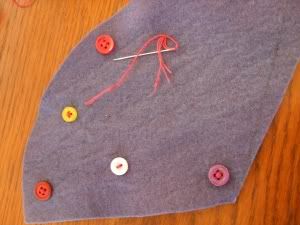
Step 3
Sew on the buttons & beads in a random pattern all over the hat using 3 strands of the embroidery thread. Remember to leave 2 clear areas on opposite sides on the rim of the cone for sewing on the buttons for the strap/hanger (you'll do this after you have sewn the cone shape).
Step 4
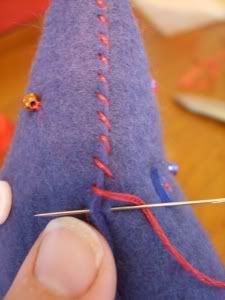
Roll the felt into a pointed hat shape, overlapping the edges where you have made your pencil line. Pin (if it helps ) & sew along this edge on the right side of the hat using overcast stitch - I like to use a contrasting thread here because it looks so cute.
Step 5
Sew on the larger buttons on opposite sides of the hat about 1cm from the edge.
Step 6
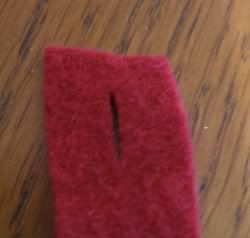
Cut slits, a little shorter than the width of the buttons you have just sewn in either end of the piece of felt for the strap/hanger.
Step 7
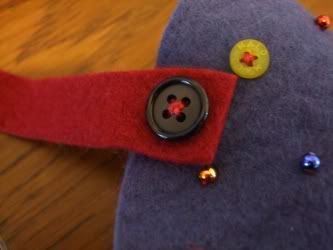
Fasten the hanger on to the buttons & tada! You're done...
I think some ric-rac edging and a little bell would make fantastic additions to this little hat if you have the inclination.
There's lots more Christmas decoration, food & celebration ideas and resources at our Christmas Matters site. Enjoy!
2 comments:
Great tutorial. I just need some time to make some! This is perfect for visits from our Christmas elf. he brings holiday treats and reports back to santa. I can use your elf hats so our elf can leave some treats.
Oh thanks Jill! Hope you get some time to make a few. They don't take too long... :) Would love to see pics if you make some.
Post a Comment