

 I've been experimenting with a few crafts for Christmas decorations that we can add as step by step projects to our Christmas website. We've created Christmas Matters to celebrate all the joy, fun & creativity of Christmas. There's tons of Christmas-related stuff to be found there - recipes, craft ideas, film reviews, book reviews, music reviews, stories & lots of information about the traditions & customs which make it such a fun time.
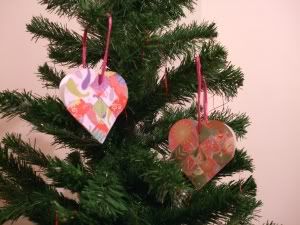
These paper hearts are definitely going to be included because they look so pretty & are great fun (although a bit fiddly until you get the hang of it) to make. Some people believe they were invented by Hans Christian Andersen - you can see some examples of paper Christmas decorations at the Hans Christian Andersen museum in Odense. The sweet thing about them is that they fold out to make a little basket, so that you can put homemade biscuits or yummy chocolates inside.
It's traditional to make them with paper which is glossy on 1 side - I expect that is because that makes the weaving a lot easier, but there is nothing to stop you experimenting with different papers & even fabric. I bet they would look fantastic with origami papers, gorgeous handmade papers & even fabric - for instance they look great made with felt.
Step 1
Download this pdf template, print it & cut it out.
Step 2
Fold a piece of paper (making sure that the template will fit) and place the short, straight edge of the template up against the fold. Draw round the template and then cut round on the line. Repeat with another piece of paper.
Step 3
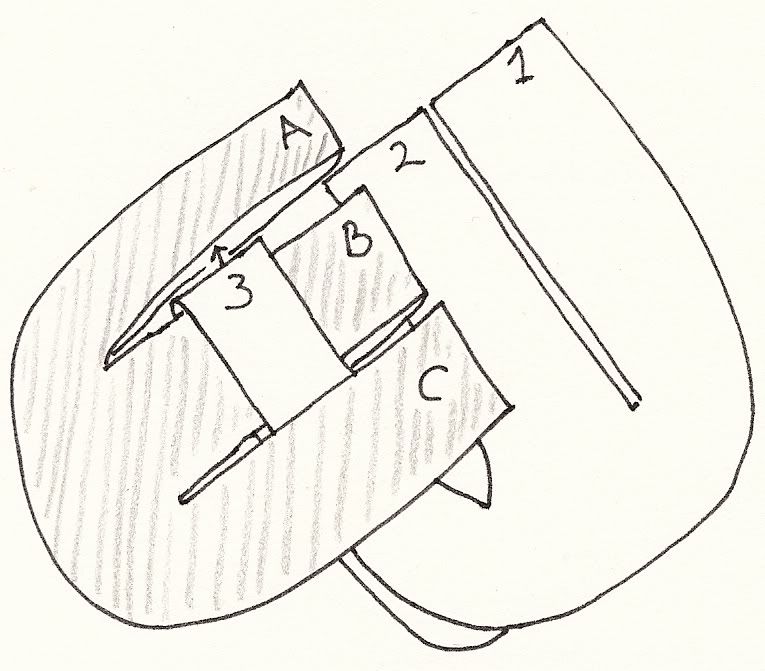
Mark & cut lines on your 2 pieces of paper as indicated on the template to create 3 strips on each piece. You will end up with 2 pieces that loook similar to those pictured here. We have marked letters and numbers on the strip to aid the following explanation - you don't have to do this!

Step 4
Now you are ready to start weaving. You need to have a bit of patience but persevere and it will all come right in the end! Bring the 2 folded pieces of paper togther, corner to corner & slide strip 3 between the folded pieces of strip C. Don't push it all the way into position - leave yourself room to push strip B between the folds of strip 3 (see picture which will hopefully make this a bit clearer - huge thanks to Sandy for the pictures!).
Step 5
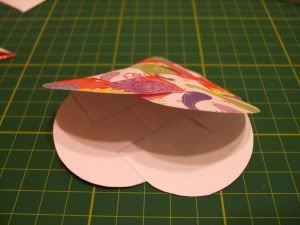
Continue with your interweaving of the strips. You will have to do a bit of bending and shuffling but it will all work out, I promise! See the picture below for the final stages of weaving.

You should end up with something like this:
Step 6
Create a hanging ribbon for your heart. I made 2 holes at the middle of the top on either side of the heart & the threaded through a piece of raffia and knotted the ends - this means you can easily access the heart basket to put goodies inside (and get them out again!).
Once you have made a few of these (and practice definitely makes perfect with this one) then you might want to try some more complicated designs. There are some fantastic ones on this wonderful website with a section all about Danish woven hearts..
I hope you have fun making some of these lovely decorations.
3 comments:
These look like a lot of fun and something I could atually (proabably) do! Thanks for the tutorial and the fun idea!
These look fun to make! I have given all of my followers an award if you would like to pop over.
XX
Post a Comment