

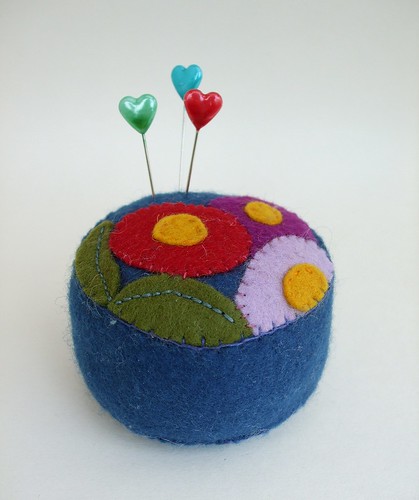
 I thought it would be really helpful to record all the helpful information I got from my fellow crafters when I was getting myself sorted for the fair last week.... yes, it's a craft fair tutorial..! I couldn't think of a good way of illustrating this one so here's a picture of a pin cushion which was the first thing that I sold at my first ever fair.. I thought it would be really helpful to record all the helpful information I got from my fellow crafters when I was getting myself sorted for the fair last week.... yes, it's a craft fair tutorial..! I couldn't think of a good way of illustrating this one so here's a picture of a pin cushion which was the first thing that I sold at my first ever fair..What you need to take: Stuff to sell (well of course!) - take as much as you can, and don't forget to practice your stall arrangement if it's your first time. Seeing my 'practice table' helped me feel a lot more confident about the whole thing. Price labels - I grouped my items and used general labels so as not to clutter up my small table too much. Wrapping stuff - I used pre-cut tissue paper - and sticky tape in a dispenser. Carrier bags/other bags/your packaging of choice - I just grabbed a load of bags we have saved at home. Cover for your table - I chose a cream throw so that all my colourful fabrics stood out beautifully. I also spent aeons ironing the thing - which is very important! In future I am going to try and find something that doesn't crease... Large bulldog clips - or something similar to hold yor table cover in place - I didn't have these and could definitely have done with them, to make sure nothing slipped. I expect that they would be absolutely essential at an outside fair on a windy day. Large sign or banner - to tell the world who you are. Lots of lovely business cards - and remember to give them out! I totally failed here - but next time will try a lot harder. I got so busy chatting to people that I forgot all about giving them my cards. Small sign telling people more about your work and your inspiration - I used an old photo frame that stood up nicely on my table without taking too much space. I found it really useful because it acted as a conversation starter with customers. Display stands of your choice - to create more space and some different levels on your table. I used boxes under my table cover which worked pretty well, but hope to invest in some more fabulous display stands when I can. Props to dress your table - if you've got a large table then I think it's really worth while using a few bits and pieces to create a stronger brand image. I used crochet hooks, knitting needles and lovely colourful pins, vintage thread and buttons to add to the crafty vibe. Paperwork - basically whatever you need! For this particular fair I needed just my insurance details, but if you're using electrical stuff you need your safety certificates and you may need your table booking information too. Receipt book and/or sales book - to record your transactions. Pens and paper and a visitors book/mailing list for people to sign is also a really good idea. Box or money belt (!) for your cash - a money belt would be particularly useful if you are doing a fair by yourself - that way you know where your money is at all time. If a money belt sounds like a really unattractive idea, pop over to Kitschy Coo's blog - she has a fantastic tutorial for a Craft Vendor Apron. I would have made one if I'd had the time before the fair. Float - how much you need really depends on the price of your goods - it helps to have prices with whole numbers! I took about £50 in loose change and a few £5 - in the event I barely needed any of it, but it was good to feel confident that I had enough. Something crafty to do during quiet moments - this can be a great conversation starter too. I had several conversations about crocheting flowers. Refreshments - your hot drink of choice in a flask, a bottle of water, some non-messy sarnies (Jane of Hooked Yarn shared her experience of a very messy coronation chicken sandwich!) and biscuits to share with your fellow vendors. Don't waste your profits on buying food and drink at the fair! Trolley/case on wheels - to get your stuff from your car to the venue. I used the one that came free with my sewing machine - the 1st time I've used it! Tissues, wet wipes, first aid stuff and make-up. Bin bags - for any mess you create - this is also useful if you're outside and you need to keep your stuff protected when it rains. And: Research cheap convenient parking - and print out a local map to get you there easily, if you don't have satnav. Dress in lots of layers - that way you're prepared for whatever the weather - even though we were inside on Saturday I was pretty cold and wished I'd worn thicker tights! So, I hope that's useful to you, I'm sure I'll be referring back to it now I've caught the craft fair bug... I've compiled all this information with a huge amount of input from: Toadybobbins (blog and Folksy shop) Big Blue Bed (etsy shop, folksy shop and blog) Gloria (dichro-findings shop and blog) So a great big THANK YOU! goes to them. |
Tuesday, 11 May 2010
Craft Fair Essentials
Subscribe to:
Post Comments (Atom)
9 comments:
Coo you're sounding like a real pro! Thanks for the links.
Toady
Thank you for the mention and it is a great idea to put all the advice in one place.
What a fab idea putting it all together in one place, (and never underestimate the importance of an appropriate packed lunch!)
Good luck with your next one xx
Jane I went with cheese (no chutney!) on your advice!
great tutorial!
Great post . . I think it sums it all up very well.
great advice! I've been thinking about doing my first craft fair for a little while - just need to find out what is in the area :)
I think that's the hard part Claire - finding a craft fair that suits you and the stuff that you make.
Oh! I've just seen you're going to be at the COW handmade market this weekend. I keep meaning to pop along and visit one month - I've been thinking of applying. You'll have to blog and let us know how it went! x
Post a Comment